Food Hygiene
 Health & Safety
 Safeguarding
 First Aid
 Business Skills
 Personal Development
Plumbing problems can feel overwhelming, especially for beginners. A dripping faucet, a running toilet, or a slow-draining sink might seem small, but they can quickly become frustrating daily annoyances. Many homeowners assume these issues require professional help, but the truth is that several minor plumbing problems are simple enough to fix yourself.
Learning basic DIY plumbing can save you money and prevent bigger damage down the road. Instead of paying for every small repair, you can handle common issues with a few essential tools like an adjustable wrench, plunger, plumber’s tape, and drain snake. These tools are affordable and easy to use.
In this guide, you’ll discover the top 5 easy DIY plumbing fixes for beginners, plus bonus beginner-friendly tips and step-by-step instructions. By the end, you’ll feel confident tackling small plumbing problems safely and efficiently.
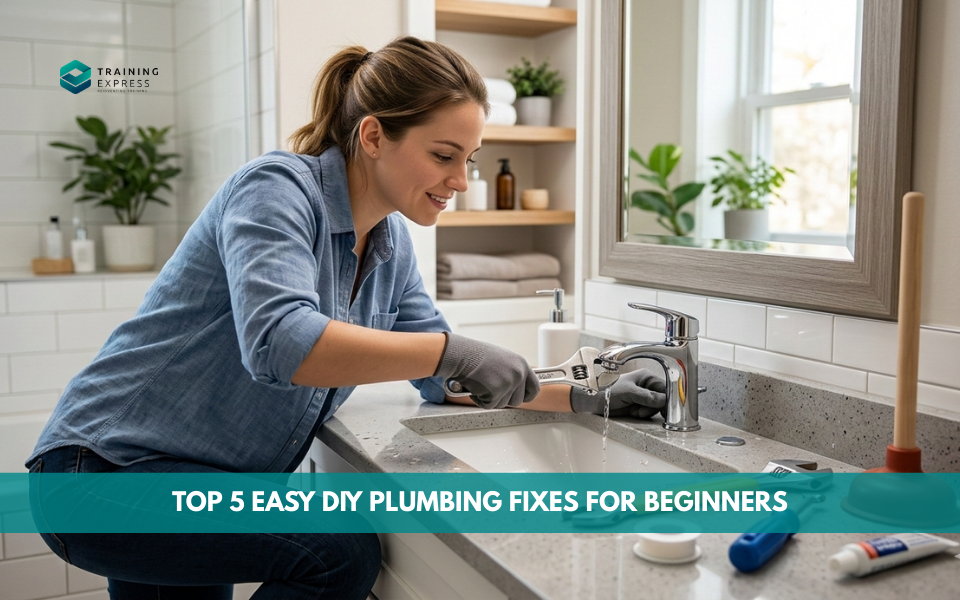
Top 5 Easy DIY Plumbing Fixes for Beginners
Tackling small plumbing problems doesn’t have to be intimidating, even if you’re a complete beginner. Many common household issues can be fixed quickly with basic tools and a little patience. Below are the top 5 easy DIY plumbing fixes that are simple, budget-friendly, and perfect for building your confidence at home.
1. Fixing a Leaky Faucet
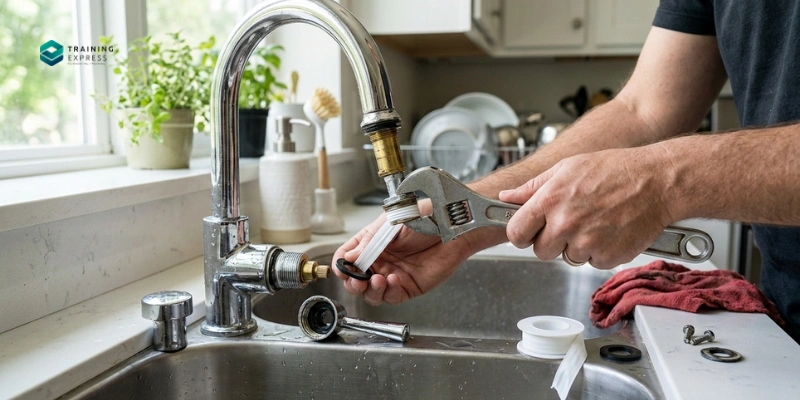
Tools Needed: Adjustable wrench, replacement washers or cartridges, plumber’s tape.
A leaky faucet may seem like a small issue, but those constant drips can waste hundreds of gallons of water over time. Besides increasing your water bill, the sound alone can be irritating—especially at night. Fortunately, this is one of the easiest DIY plumbing repairs for beginners.
Step-by-Step Guide:
- Turn off the water supply under the sink. Test the faucet to ensure no water flows.
- Plug the drain with a stopper or cloth to prevent losing small parts.
- Use an adjustable wrench to remove the faucet handle carefully.
- Identify whether your faucet uses a washer or cartridge system.
- Remove the worn washer or cartridge and replace it with a matching new part.
- Apply plumber’s tape if needed, then reassemble the faucet.
- Turn the water supply back on and test for leaks.
Tip: Always bring the old washer or cartridge to the hardware store to ensure you purchase the exact match.
2. Unclogging a Drain
Tools Needed: Plunger, drain snake, baking soda & vinegar.
Clogged drains are common in kitchens and bathrooms due to hair, grease, food particles, and soap buildup. Before calling a plumber, try these safe and beginner-friendly methods.

Bathroom Sink Steps:
- Remove any visible hair or debris from the drain opening.
- Place a plunger over the drain and pump firmly several times.
- If the clog persists, insert a drain snake and rotate it gently to hook debris.
- Pour half a cup of baking soda followed by one cup of vinegar. Let it fizz for 10–15 minutes, then flush with hot water.
Kitchen Sink Steps:
- Remove standing water using a cup or bowl.
- Plunge firmly to loosen the blockage.
- Use a drain snake if needed.
- Rinse with hot (not boiling for PVC pipes) water.
Tip: Avoid chemical drain cleaners—they may corrode pipes and cause long-term damage.
3. Replacing a Showerhead
Tools Needed: Wrench, plumber’s tape.
Replacing a showerhead is a quick and satisfying upgrade that improves water pressure and efficiency. It’s also perfect for beginners looking for an easy win.

Easy Replacement Steps:
- Unscrew the old showerhead using a wrench. Wrap a cloth around it to avoid scratching.
- Clean any mineral deposits from the shower arm threads.
- Wrap plumber’s tape clockwise around the threads 2–3 times.
- Screw on the new showerhead by hand first, then tighten gently with a wrench.
- Turn on the water and inspect for leaks.
Tip: Cleaning the threads thoroughly ensures a watertight seal and prevents dripping.
4. Fixing a Running Toilet
Tools Needed: Screwdriver, replacement flapper or fill valve.
A running toilet can waste significant water every day. Usually, the issue comes from a worn-out flapper or improperly adjusted fill valve.

Step-by-Step Guide:
- Remove the tank lid carefully and set it aside.
- Check the flapper at the bottom of the tank for cracks or warping.
- If damaged, detach the old flapper and install a new one.
- Inspect the fill valve and adjust the float if the water level is too high.
- Flush the toilet to test performance and ensure the water stops running.
Tip: Periodically check internal tank components to prevent silent leaks that raise water bills.
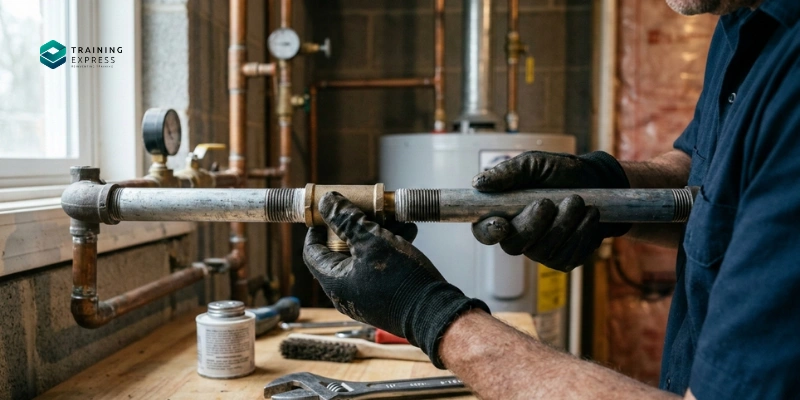
5. Patching Small Pipe Leaks
Tools Needed: Pipe repair clamp, epoxy putty, or rubber repair tape.
Small pipe leaks can lead to mold growth and structural damage if ignored. Temporary DIY solutions can stop the leak until you arrange permanent repairs.

Quick DIY Method:
- Shut off the main water supply immediately.
- Dry the leaking area completely using a cloth.
- Apply epoxy putty directly over the crack or wrap rubber repair tape tightly around it.
- Secure the area with a pipe repair clamp for added strength.
- Turn the water back on slowly and check for leaks.
Tip: Ensure the pipe surface is dry and clean for the repair material to bond properly.
Online Plumbing Course Level 1 & 2 for Just £8.88!
You won’t find this deal anywhere else!
Take This CourseUse Coupon Code:
Use this coupon at Checkout
Bonus 5 Easy DIY Plumbing Fixes for Beginners
Once you’ve mastered the basic plumbing repairs, there are a few extra beginner-friendly fixes that can make a big difference in preventing leaks and improving pipe performance. These simple maintenance steps help extend the life of your plumbing system and reduce the risk of costly water damage. The best part? They require minimal tools and just a little attention to detail.
1. Replace Flexible Hoses (Speedways)
Tools Needed: Adjustable wrench, new flexible hose.
Flexible supply hoses are commonly found under sinks, toilets, and washing machines. Over time, they can crack, bulge, or weaken due to water pressure and age. Replacing them is a simple preventive maintenance task that can protect your home from unexpected flooding.

Step-by-Step:
- Turn off the water supply valve connected to the hose.
- Place a small bucket underneath to catch any remaining water.
- Use an adjustable wrench to loosen and remove the old hose.
- Attach the new hose by hand first, then tighten gently with a wrench.
- Turn the water back on slowly and check for leaks.
Tip: Replace flexible hoses every 3–5 years, even if they look fine, to prevent sudden bursts.
2. Deburr Pipes After Cutting
Tools Needed: Pipe cutter, deburring tool.
When cutting copper or PVC pipes, sharp edges often remain inside and outside the pipe. These rough edges can disrupt water flow and prevent fittings from sealing properly, leading to leaks.

Step-by-Step:
- After cutting the pipe, inspect both the inner and outer edges.
- Use a deburring tool to smooth the inside edge with a circular motion.
- Lightly smooth the outside edge as well.
- Wipe away any loose debris before connecting fittings.
Tip: Taking a few extra seconds to deburr ensures tighter connections and improves long-term durability.
3. Clean Pipes and Fittings Before Soldering
Tools Needed: Wire brush, cleaning cloth.
Proper preparation is key when soldering copper pipes. Dirt, oxidation, or grease can weaken the bond and cause leaks later.

Step-by-Step:
- Use a wire brush to scrub the inside of fittings.
- Clean the pipe ends until they appear shiny and smooth.
- Wipe both surfaces with a clean cloth to remove dust.
- Apply flux before soldering for a strong seal.
Tip: Clean, polished metal allows solder to flow evenly, creating a stronger, leak-free joint.
4. Install Teflon Tape Correctly
Tools Needed: Plumber’s (Teflon) tape.
Threaded pipe connections often require plumber’s tape to create a watertight seal. Incorrect wrapping can lead to slow leaks.

Step-by-Step:
- Clean the threaded fitting.
- Wrap the tape clockwise (the same direction you tighten).
- Apply 2–3 even layers without covering the pipe opening.
- Screw the fitting together firmly.
Tip: Wrapping tape in the wrong direction can cause it to loosen during tightening.
5. Hand-Tighten Pipes to Avoid Cross-Threading
Tools Needed: Adjustable wrench.
Cross-threading happens when pipe threads are misaligned and forced together, permanently damaging fittings.
Step-by-Step:
- Align the threaded parts carefully.
- Begin tightening by hand to ensure smooth threading.
- Once secure, finish tightening gently with a wrench.
- Avoid overtightening, which can crack fittings.
Tip: If you feel resistance immediately, stop and realign before tightening further.
Tools for DIY Plumbing Repairs
Every beginner should maintain a simple plumbing toolkit to handle small repairs confidently. Essential tools include:
- Adjustable wrenches
- Plungers
- Pipe cutters & deburring tools
- Plumber’s tape & epoxy putty
- Drain snakes

You may also consider keeping a bucket, old towels, and a flashlight handy for convenience. When purchasing tools, choose durable materials like stainless steel with comfortable, non-slip grips. High-quality tools not only last longer but also make repairs easier and safer. Investing in reliable equipment today can save significant time, stress, and money in future plumbing projects.
Final Words
Handling small plumbing problems doesn’t have to be intimidating. From fixing a leaky faucet to unclogging drains and replacing showerheads, these top 5 easy DIY plumbing fixes can save money and prevent bigger issues. The bonus tips further enhance your beginner skills and help you avoid common mistakes.
With basic tools and simple step-by-step instructions, anyone can tackle minor plumbing repairs safely. Start with the easiest fix today and prevent small leaks from turning into costly problems!
Frequently Asked Questions (FAQ)
How much can I save by fixing small plumbing issues myself?
You can save $100–$500 per repair depending on the issue. Simple DIY tasks like unclogging drains, replacing washers, or fixing a dripping tap are much cheaper than calling a plumber. Tackling small plumbing issues at home can prevent bigger expenses later.
Do I need professional help for all plumbing repairs?
Not all plumbing repairs require a professional. Minor leaks, clogs, or dripping taps can often be fixed safely at home. However, complex issues like burst pipes, gas-connected systems, or sewer problems always need a licensed plumber.
What are the most common DIY plumbing mistakes?
Common DIY plumbing mistakes include:
- Overtightening fittings, which can crack pipes
- Using harsh chemicals, which can damage pipes
- Not shutting off the water supply before starting repairs
- Incorrectly measuring pipe lengths, leading to leaks
Avoiding these mistakes ensures safer, longer-lasting repairs.
How do I know when a leak is too big to fix myself?
If water is spreading quickly, pooling, or pipes burst, it’s time to call a professional plumber immediately. Large leaks can cause serious water damage, mold, and structural issues if not addressed quickly.
Can I use any tape or epoxy for pipe repairs?
No. Always use plumber-specific tape (PTFE/Teflon tape) and waterproof epoxy. Household tape, glue, or non-specialized adhesives are not safe for plumbing repairs and can fail under pressure.
How often should I check flexible hoses in my home?
Inspect flexible hoses every 1–2 years for cracks, bulges, or corrosion. Replace any damaged hoses immediately to prevent leaks or flooding.
Is soldering pipes safe for beginners?
Soldering requires skill and caution. Beginners should start with simpler plumbing tasks before attempting soldering to avoid burns, leaks, or costly mistakes.
How do I avoid cross-threading pipes?
To avoid cross-threading:
- Start threading pipes by hand before using a wrench or pliers
- Ensure threads are clean and aligned
- Tighten carefully to get a leak-free fit
This prevents leaks and damage to your pipes.
Can DIY plumbing damage my home insurance coverage?
Yes. Improper or unsafe DIY plumbing can affect insurance claims. Always follow safety guidelines, building codes, and manufacturer instructions to protect your coverage.
What is the easiest plumbing fix for beginners?
The easiest DIY plumbing fixes include:
- Replacing a showerhead
- Changing a faucet washer
- Installing a tap aerator
These are safe, low-cost, and beginner-friendly ways to get started with DIY plumbing.

Related Blogs


- Available Courses
- Job Ready Programme52
- Design36
- Training10
- Accounting & Finance Primary56
- Teaching & Academics Primary39
- Teaching23
- Quality Licence Scheme Endorsed181
- Law10
- Animal care10
- Charity & Non-Profit Courses28
- HR & Leadership5
- Administration & Office Skills6
- Mandatory Training36
- Regulated Courses5
- AI & Data Literacy31
- Compliance39
- Health and Social Care293
- Personal Development1710
- Food Hygiene128
- Safeguarding81
- Employability288
- First Aid73
- Business Skills302
- Management447
- Child Psychology41
- Health and Safety563
- Hospitality28
- Electronics30
- Construction66
- Career Bundles201
- Marketing39
- Healthcare183
- IT & Software241