
You can handle a medical emergency if you know the basic first aid practices and follow DRSABC. With DRSABC, you can maintain someone’s breathing and lessen the pain of an injury or sudden illness until an ambulance arrives. For them, this might mean the difference between life and death.
This blog will help you to learn about:
Table of Contents
What is First Aid?
First aid refers to the emergency or primary care you provide when a person is injured or ill until proper medical treatment is given. Sometimes, first aid care is enough for minor conditions. However, you should continue first aid care for severe problems until more advanced care becomes available.

The decision to act correctly with first aid can save someone’s life. Here are some suggestions you can remember.
- First, if possible, you should introduce yourself to the injured or ill person.
- Second, explain to the patient that you are a first-aid provider and are willing to help.
- Third, the person must allow you to help them; do not touch or help them until they permit you.
- Fourth, if you find someone seriously injured and confused, you can guess they would want you to help them.
Who Needs First Aid?
First aid may be needed for medical emergencies such as stroke, seizures, heart attack or minor medical conditions. Moreover, first aid may be required to keep the victim alive in serious issues.
One critical step in determining ‘who needs first aid’ is the injured or ill person’s responsiveness and the severity of their condition. You may follow the DRSABC if someone needs first aid, but you shouldn’t talk loudly (“ Need any help? Are you okay?”). Instead, look for help if the person is unresponsive, and you don’t know how to help them.
Who Can Administer First Aid?
Someone with primary medical training can generally perform first aid. In addition, you should conduct first aid if you know basic medical training or if you have a good understanding of the DRSABC steps. Apart from this, mental health first aid is another wing of first aid to provide emergency mental health support and care.
Similarly, you can use psychological first aid as early treatment for people at risk of developing PTSD. (Post-traumatic Stress Disorder (PTSD) is a stress and mental disorder that starts with experiencing a terrifying event. Symptoms may include severe anxiety, nightmares, and uncontrollable thoughts about the event).
Besides, first aiders should be qualified and skilled. Moreover, they should hold a certificate in first aid.
What Does DRSABC Stand For in First Aid?
DRSABC is not only an acronym, but also a first-aid action plan. And it’s a set of steps from starting to ending first aid. DRSABC stands for Danger, Response, Send, Airway, Breathing, and CPR.
Over twenty years ago, this action plan was referred to as DR ABC, so as you can see, some steps have been added to the action plan to ensure a successful first aid treatment.
How to Follow DRSABC?
DRSABCD is the sequence of seven steps to follow when providing life support. Let’s go through the steps:
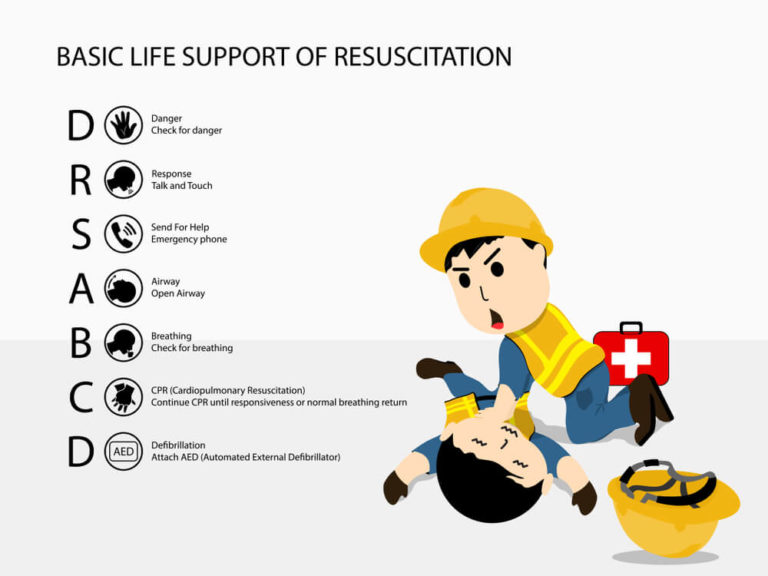
First: Danger
The first and foremost step of DRSABC is Danger. You need to deal with danger before doing anything else. It could be any potential danger to yourself, the patient, or the victim. Besides, the first step in DRSABC is to make sure you are safe. Then try to ensure that no one is left in danger. In every situation, first, carefully assess the danger. Then go for help. If you are confused about an emergency, seek help, or call the emergency services.
When assessing the danger, you must go over to the affected person once you are sure it is safe to help the victim. This observation can keep you safe, prevent another casualty, and avoid leaving you unable to help. A physical threat is often present in first-aid cases involving illnesses or injuries. The potential danger can bring a threat to you or the person already in need of attention.
An example could be if there has been a burnt house and a victim is trapped. Entering the home to help may cause additional risk to you, and you can be stuck there too. Another example of potential danger would be if someone is critically hurt by someone else. Keeping your distance is the safest option if the attacker is still present. You should wait for more help to arrive.
Second: Response
The second step of DRSABC is Response. The following step is to check for a response from the injured person once you have determined that it is safe to approach them. Getting someone’s attention and checking to see if they respond is the first step in checking for a response. This can be done by saying their name, touching them, or asking a few simple questions, such as ‘’what is your name? the date, how many fingers you hold up etc’’, and whether they can feel your touch.
In addition, you can use the COWS approach. C stands for “Can you hear me?” O for “Open your eyes,” W for “What is your name?” and S for “Squeeze my hand.” If you get a reaction or response, it might be helpful to understand the nature of their suffering and how they are feeling.
Moreover, This will help you respond more clearly while communicating with the emergency service providers by assisting them in explaining the patient’s condition, speculating about what has happened, and determining what kind of help they need.
If the victim doesn’t answer, you should act fast and move to the next stage as soon as you can.
Third: Send for Help
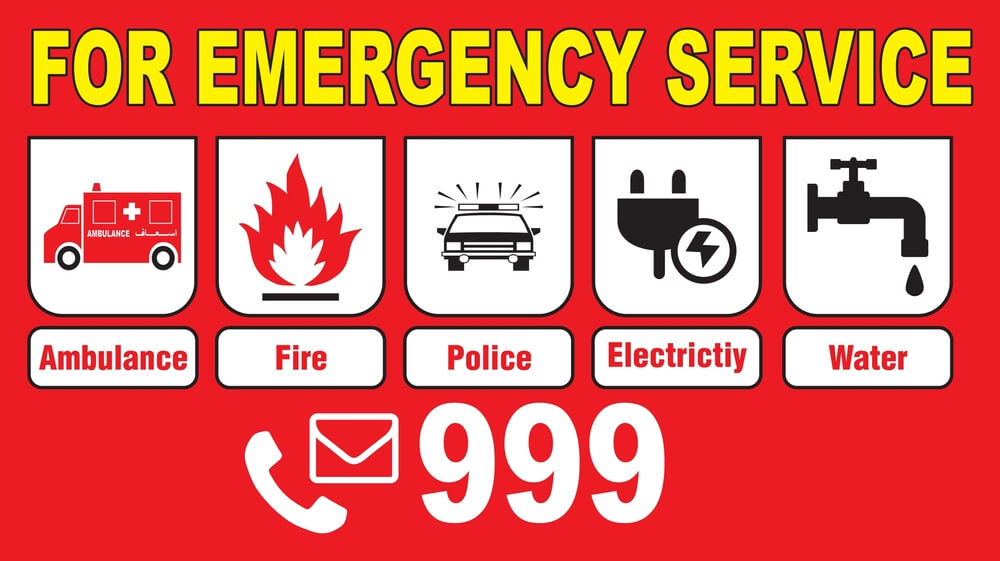
This is the third step of DRSABC. You must look for assistance once you’ve determined whether a response has come or not. In addition, you can call the relevant emergency services or request someone else to help you. If you are in serious trouble, you need emergency mental health care and medical service, call 999. This is when someone is seriously injured, or their life is at risk.
Fourth: Airway
The following three stages of DRSABC only apply when the affected person appears to be unconscious and has not responded. First, after you have called for help, check for a response to be sure they can hear you. By this point, there should be someone else to assist you, and emergency services should be on the way. The following step is to clear and check the patient’s airways.
You can check someone’s airways by visually evaluating whether something is blocking their nose or throat that may be stopping their breathing. Probably you need to get close to them and open their mouths to do this. Do it if you feel comfortable and safe.
If you feel confident, you may remove anything that appears to be blocking their airway. Still, it is better to wait for medical help if you worsen a situation. This can be done by lying the victim on their back and gently raising their head with two fingers so that their neck is straight and the position is not going to harm their throat.
Besides, lift the chin and tilt the head to open the victim’s airway. Check for obstructions at the back of the throat. If gloves are available, put them on and use your fingers to remove debris.
Pay particular attention to the following:
- The victim’s tongue, since it could reappear in the airway.
- Stomach content that rises into the oesophagus but is not vomited is known as regurgitation.
- Foodstuffs
- Mouth guards, loose dentures
- Fluids such as blood and mucus.
Manage children the same way you would do an adult. Besides, you can follow the experts’ suggestions:
- First: Put your hand on the head.
- Second: Put your fingers under the victim’s chin’s point.
- Third, gently tilt the head back and elevate the chin to open the airway.
Keep the jaw supported and the head in a neutral position for newborns (under one year). Their softer trachea can compromise the airway and cause distortion.
Fifth: Breathing
The fifth step of DRSABC is breathing. It is about confirming whether someone is breathing or not. To start, you can check this visually: Does their chest move up and down? If this doesn’t make things clearer, put your ear to their lips and nose to hear their breathing more clearly. If they appear to be breathing, listen to see if it sounds smooth, fast, shallow, or obstructed.
Besides, when calling, you should provide basic information by answering the operator’s questions as best as possible.
The operator may ask:
- First: Which emergency service do you want, Fire or Police or Ambulance?
- Second: What is your exact location?
- Third: Your name and phone number, victim’s condition.
- Fourth: The nature of the emergency (tell them about what happened)
Moreover, try to be with the injured person. They might start to move, which could place them in more danger, or they might get bewildered and confused. The actions you take before calling for help are crucial since the operator may inquire about the patient. You should have already gathered this information when you checked for a response.
Again, if you do not have a mobile phone or find yourself in an area where few to no people are present, you should first call out for assistance to see if anyone responds. Finally, if there are no other options, you should only leave an injured person alone to get help. But try to get back to them as fast as you can or keep an eye on them.

Besides, you can check the victim’s breathing by placing your hand on the lower part of the breast. If the individual is conscious but not breathing, the best thing you can do is place them in the recovery position until aid arrives. This prohibits them from rolling over and creating further issues, keeps their airways open, and stops them from choking.
Moreover, keep in mind that you should avoid placing someone in the recovery position if they appear to be physically injured because doing so could worsen their condition. You should only take this final step for those who appear unhurt but unconscious.
To place a person in recovery:
- First: Put one hand across their face, so the back is against a cheek, and the other is across their face in a straight line with their head.
- Second: To ensure that they are stable and won’t roll back over, roll them toward the raised hand and move their upper leg in your direction.
- Third: Recheck their airway.
Sixth: Circulation/ CPR
DRSABC’s final step is to start performing CPR to restore the victim’s circulation. In addition, you should start CPR immediately when someone is unconscious and not breathing. Place your second hand across the top of the person’s chest as they are lying on their back, face up, with the heel of your other hand on the centre of their chest. Press down firmly until you reach roughly a third of their chest’s depth, or around 5 cm (4 cm for a newborn).

Remember, the rate is two compressions per minute (100/120 compressions per minute). If you feel comfortable doing so, perform two rescue breaths after a few chest compressions. To administer, tilt the person’s head and lift their chin; squeeze their nose and place your mouth over theirs.
Besides, give full breaths to adults, tiny breaths to children and just two puffs to the infant. Breathing is optional in some conditions. Moreover, If mouth-to-mouth is uncomfortable for you, stick to compressions. Until the victim responds or until paramedics arrive to take over, keep performing CPR on them.
What does the Primary Assessment Consist of?
The primary assessment of first aid is understanding the situation first. Don’t panic and gauge what has happened. In addition, your presence of mind can help you with what to do and what medical attention the victim might need.
Moreover, to carry out the primary assessment, DRSABC ensures that you take proper steps. Furthermore, it helps to keep an unwell or injured person stable and safe until complete medical treatment services are available.
The First Aid Method of DRSABCD
DRSABCD is also a series of steps to assist someone in proceeding with the first aid process. DRSABCD represents Danger, Response, Send, Airway, Breathing, CPR, and Defibrillation. We have discussed all parts of the acronym except ‘Defibrillation’. So, let’s see what Defibrillation is.
Adults who are unconscious and not breathing require Defibrillation. If there is an automated external defibrillator (AED) nearby, you can use it. They are available at many public locations as well as clubs and organisations.
In addition, an automated external defibrillator (AED) is a device that administers an electrical shock to stop any abnormal heartbeat (arrhythmia) from getting the regular heart beating to resume. Moreover, this simple acronym, “DRSABCD”, can help you walk through the procedure and perform each step at the right time.
First Aid Kit
A first aid kit is a container—a box, bag, or pack—that contains supplies for treating minor injuries such as scrapes, bruises, sprains, and burns.
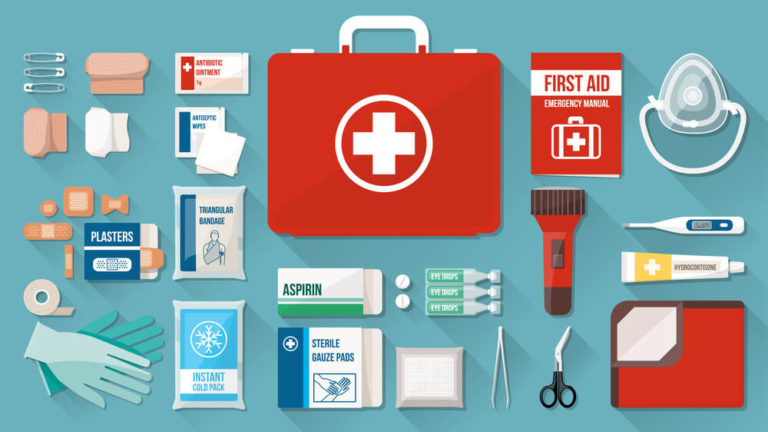
In addition, more advanced first aid kits might include convenience materials like bug sting wipes, flu medicines, survival gear, and survival supplies.
Moreover, you should keep the necessary first aid tools to handle a medical emergency or if you sustain an injury. Ensure you know how to utilise every item in your kit, especially the tools and medicines.
Also, teach your family and relatives how to use the kit. Perhaps you’re the one in need of first assistance.
DRSABC Action Plan
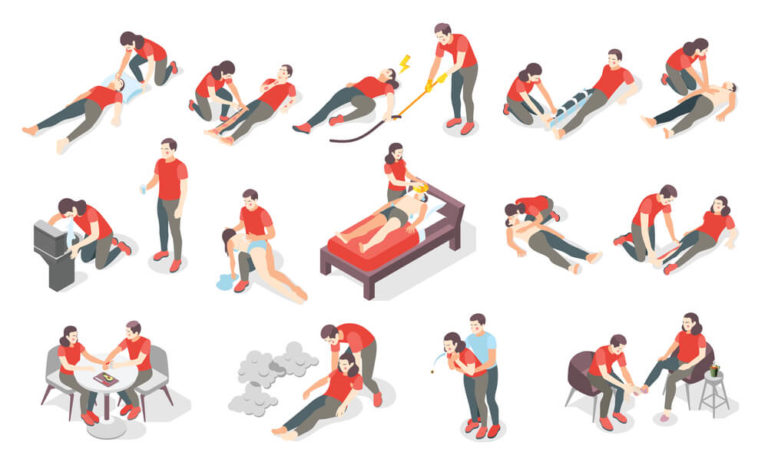
DRSABC action plan is a sequence of actions when helping a victim in an emergency or injury. If you can remember and follow the action plan, you will be clear about do and don’ts of an emergency condition. Besides, this can help the patient get better treatment before reaching a hospital.
Summary
DRSABC or DRSABCD is not only an acronym but also a first-aid action plan. In any first aid course, you undoubtedly have repeatedly encountered the acronym DRSABCD. It’s necessary to remember that we shouldn’t panic when helping someone in an emergency. Because it’s a situation that can save them, silly mistakes can be fatal, and we might lose someone.
So, follow DRSABC steps carefully-Danger, Response, Send, Airway, Breathing, CPR, and Defibrillation. The DRSABC action plan is vital in assessing whether a patient has any life-threatening conditions and if immediate first aid is required.
In addition, this plan is taught in the first aid courses which help to develop a structured technique for a medical emergency.
FAQ
What are the 3 C’s of CPR in DRSABC?
For witnessing a sudden emergency:
First: ‘CHECK’. Check to see if the person can respond and breathe normally.
Second: ‘Call’. Call 911 as soon as possible or send someone else to call.
Third: ‘COMPRESS’. Start chest compressions. Minimum 100/min.
What is the 30 2 rule in CPR?
The rule is simple: give two breaths after every 30 chest compressions. Then, continue CPR until you see a response or the medical team arrives.
- Available Courses
- Marketing34
- Charity & Non-Profit Courses26
- Job Ready Programme28
- Animal care8
- Law8
- Quality Licence Scheme Endorsed111
- Teaching15
- Teaching & Academics Primary30
- Accounting & Finance Primary37
- Training4
- Design17
- IT & Software195
- Healthcare131
- Health and Safety424
- Career Bundles102
- Construction52
- Electronics28
- Hospitality24
- Health and Social Care248
- Child Psychology38
- Management385
- Business Skills283
- First Aid72
- Employability269
- Safeguarding77
- Food Hygiene106
- Personal Development1385
 Food Hygiene
 Health & Safety
 Safeguarding
 First Aid
 Business Skills
 Personal Development


